The Tips & Tools You Need To Cut Vinyl Plank Flooring
Cutting vinyl plank flooring is an easy DIY task — a sharp utility knife, accurate measurements, and a bit of muscle power are the common requirements for a job well done. But, while scoring and snapping vinyl works well for most simple, straight cuts, there are times when this method will come up short. Likewise, a lack of planning before you cut can leave you with planks that are incorrectly sized.
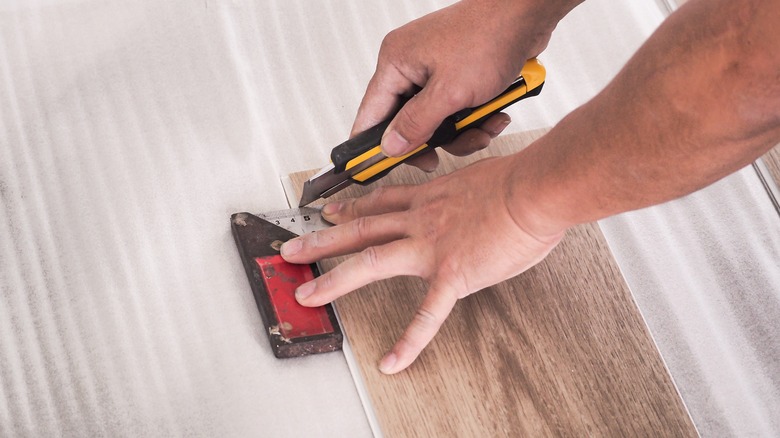
To make your cuts as simple and accurate as possible, you should first pick the right tools for the job. Scoring and snapping with a utility knife works for many cut types — even the irregular cuts, if you've got the patience. On the other hand, a jigsaw or miter saw can come in handy when the utility knife proves to be no match for your planks. Apart from equipping yourself with suitable tools, you also need to do some prep work to let the vinyl floor adjust to its new environment. When you're finally cutting, a few tricks will help steady your hand and keep your incisions precise.
The tools you need to cut vinyl planks

To choose the ideal tool for cutting vinyl planks, you need to consider the type of cut you need to make. For most straight cuts — especially those you make along the width of a plank — simply scoring the plank with a utility knife and snapping it in two works just fine. The plank is long enough on either side of the cut to give you leverage to snap it with little force. However, irregular cuts, or those involving tiny sections of the plank may leave you struggling to snap the vinyl. Likewise, snapping may prove difficult if the plank is quite thick. In these cases, you can resort to cutting with a miter saw or a jigsaw if you've got one — they'll make quick work of the cut and save you time. That said, cuts that are not straight can still be done by scoring and snapping — just be ready to score the vinyl multiple times until the groove is deep enough to let you fracture the material.
Apart from the actual cutting tool, you should equip yourself with accessories that will help you slice the planks safely, accurately, and with little waste. Knee pads, gloves, and safety googles will protect your knees, hands, and eyes. Meanwhile, you can measure off your cuts with a measuring tape, a T-square, or a straight-edge ruler. If you're measuring with a rigid ruler, use it to guide your pencil when you mark the cuts.
Tips for cutting vinyl planks quickly and accurately

With your arsenal of tools assembled, you're almost ready to take the knife to the vinyl. But first: The planks need time to acclimate to their new environment. That's the room where you plan to install the vinyl flooring. Since vinyl is a porous material, it will either contract or expand in response to humidity changes. And these will occur as you move the planks from the warehouse or store to the new space. The last thing you want is to cut the planks to what you think is the perfect size, and then watch them shrink or swell up to 1⁄4-inch. To avoid these size changes, let the planks sit in the room where you'll eventually lay them for no less than 48 hours before you cut them.
Once your vinyl planks have acclimated, it's time to cut. Straight cuts are straightforward — no pun intended. However, there's an easy trick that will help you snap the vinyl right along the scored line. You'll need a sturdy desk surface for this to work. Once you've scored the vinyl, align the cutting line with the edge of the desk, then push downward to fracture the plank along the scored line. Now, if your cut is not straight, a desk edge won't help. You'll have to mark the cut or use a template, then score along the line several times until you get a deep groove. Then, snap the vinyl like you would with a straight cut.